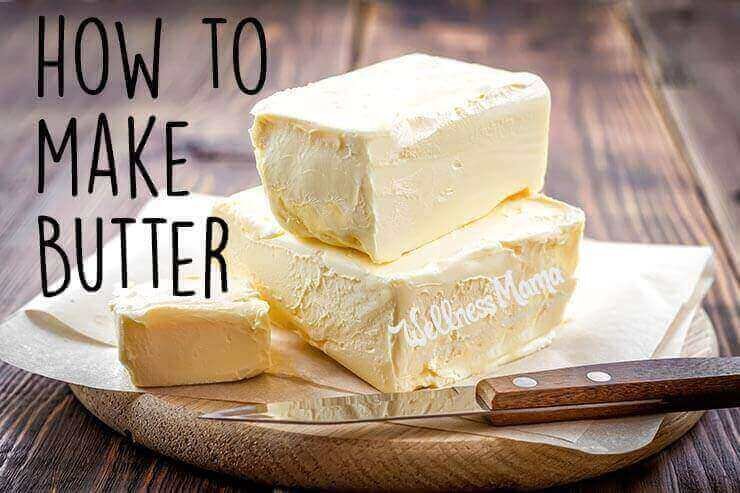
Butter is a staple in kitchens around the world, beloved for its rich flavor and versatility in cooking and baking. Making your own butter at home can be a rewarding and surprisingly simple process. This guide will take you through the steps to create your own homemade butter, offering tips and insights to enhance your butter-making experience.
Understanding the Basics of Butter
Butter is essentially the fat that has been separated from the liquid components in cream. This process is known as churning. Historically, butter was made by agitating cream in a churn until the fat globules coalesced, separating from the buttermilk. Today, while commercial butter-making has become a highly mechanized process, the basic principles remain the same, and it’s quite feasible to replicate this process at home with minimal equipment.
Choosing Your Cream
The journey to making delicious homemade butter starts with selecting the right cream. The type of cream you choose will significantly impact the flavor, texture, and yield of your butter. Heavy cream or heavy whipping cream with a high-fat content (at least 35%) is ideal for butter-making. Organic and grass-fed creams can offer more complex flavors due to the varied diets of the cows, but any high-quality cream will work well.
The Churning Process
Equipment Needed
To make butter, you will need a few basic kitchen tools:
- A large mixing bowl
- An electric mixer, stand mixer, or a jar with a tight-fitting lid if you’re up for a more manual method
- A spatula
- Cheesecloth or a fine mesh strainer
- A container for storing your butter
Step-by-Step Guide
- Preparation: Begin by chilling your mixing bowl and beaters in the refrigerator for at least 30 minutes. This helps keep the cream cold during the churning process, which is crucial for the fat to separate properly.
- Churning the Cream: Pour the chilled cream into your mixing bowl. If using an electric or stand mixer, start at a low speed and gradually increase to medium-high. If you’re using a jar, fill it halfway with cream, secure the lid tightly, and start shaking.
- Watching the Stages: First, the cream will turn into whipped cream. Continue churning, and you will see it start to separate into butter solids and buttermilk. This can take anywhere from 5 to 15 minutes, depending on the method used.
- Separating the Butter: Once the butter has formed, pour the mixture through cheesecloth or a fine mesh strainer to separate the butter solids from the buttermilk. Don’t discard the buttermilk; it’s great for baking!
- Rinsing the Butter: Transfer the butter solids back into the bowl and rinse them under cold water, gently pressing the butter to remove as much buttermilk as possible. This is important to prolong the shelf life of your butter.
- Flavoring and Storing: At this point, you can add salt to your butter if desired. Then, shape it as you like and store it in an airtight container in the refrigerator.
Customizing Your Butter
One of the joys of making homemade butter is the ability to customize it to your taste. You can add various flavorings during the final mixing stage, such as herbs, garlic, honey, or even edible flowers. This can transform your butter from a basic spread to a gourmet condiment.
Tips for Perfect Homemade Butter
- Temperature is Key: The temperature of the cream is crucial. It should be cold but not too cold. If it’s too warm, the fat won’t separate properly; if it’s too cold, it might not churn at all.
- Patience is a Virtue: Don’t rush the process. The cream goes through several stages before turning into butter, and each stage is important.
- Quality Matters: The quality of the cream you start with will directly affect the taste of your butter. Fresh, high-fat content cream yields the best results.
- Storage: Homemade butter can be stored in the refrigerator for up to a month or frozen for longer storage. Ensure it’s well wrapped or in an airtight container to prevent it from absorbing odors.
The Benefits of Homemade Butter
Making your own butter is not just about the end product; it’s about the experience and the satisfaction that comes with it. Homemade butter often surpasses store-bought in flavor and quality, and you have the added benefit of knowing exactly what’s in it—no additives or preservatives, just pure, creamy butter. Moreover, the process of making butter can be a fun and educational activity, especially for children, teaching them about the science behind how different states of matter are formed from the same ingredient.
Conclusion
Making butter at home is a surprisingly simple process that yields delicious and rewarding results. By following the steps outlined in this guide, you can transform cream into rich, flavorful butter that will enhance any dish. Whether you’re spreading it on fresh bread, using it in your favorite recipes, or savoring it on its own, homemade butter is a treat that celebrates the joy of making something delightful from scratch. So, grab some cream and get churning; the perfect batch of homemade butter awaits!


